DIY Monster Costume
(using Fruit of the Loom® full zip hoodie or hoodie sweatshirt)
DIY Monster Costume
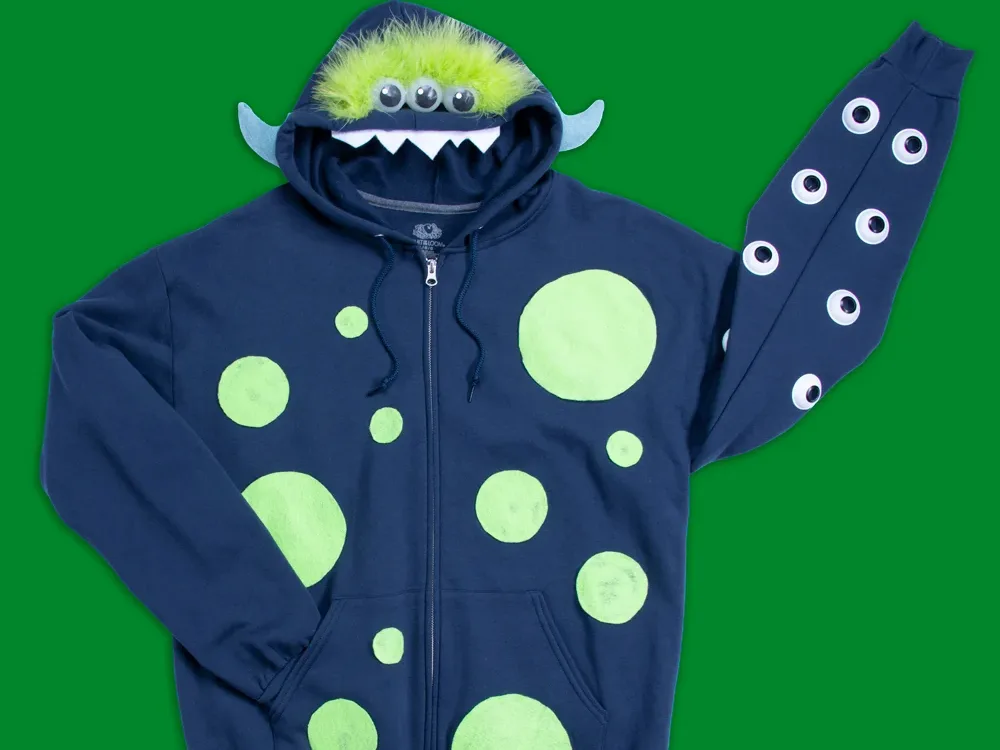
Looking for a fun costume for your little monster? With a Fruit of the Loom® Full Zip Hoodie or a Fruit of the Loom® Hoodie Sweatshirt and some craft supplies, you can be Halloween-ready in no time.
Estimated Cost: $30 or less
Use caution while crafting! Adult supervision recommended while using sharp or high-temp tools.
Costume garments:
Adult - Fruit of the Loom® Full Zip Hoodie or Hoodie Sweatshirt
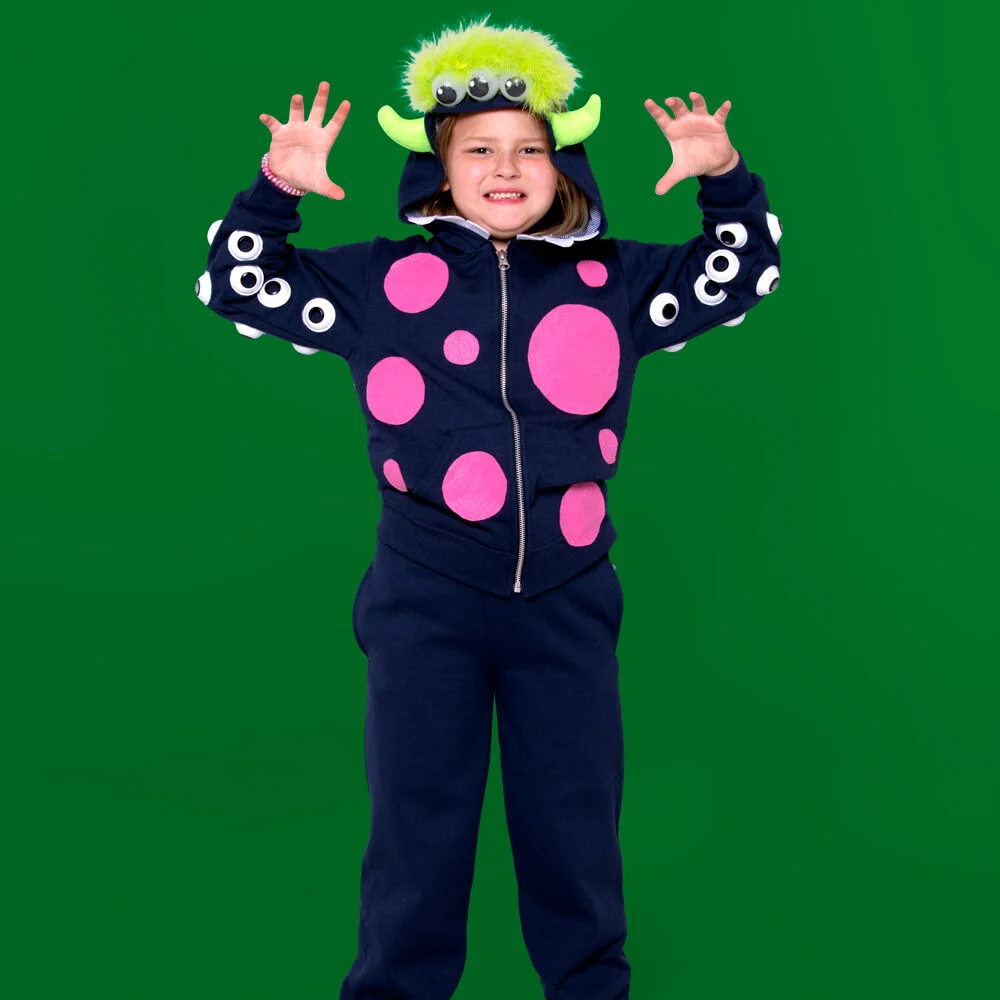
Kids - Fleece Full Zip Hoodie
Costume supplies:
3 ping pong balls
1 Piece white felt
2 Pieces of felt (any color)- this is for the "spots"
1 Piece of felt (any color)- this is for the horns
Eyeball glasses pack
Feather boa, or any fluffy trim
Fabric marker
Items you need but may already have:
Hot glue gun & glue sticks
Scissors
Fiber fill
Glue Stick
Option and/or Substitutions
Finger protection for hot glue gun, hot glue: if you want to craft this with a child, you could use fabric glue. Fiber fill: you could use any light-weight material. (this will be used to stuff the horns). Eyeball glasses: If you can't find these glasses at your local store, you could use suction cups, fabric cut into "donut" shape, google eyes- it's a monster, make it your own!
Start with the monster template!
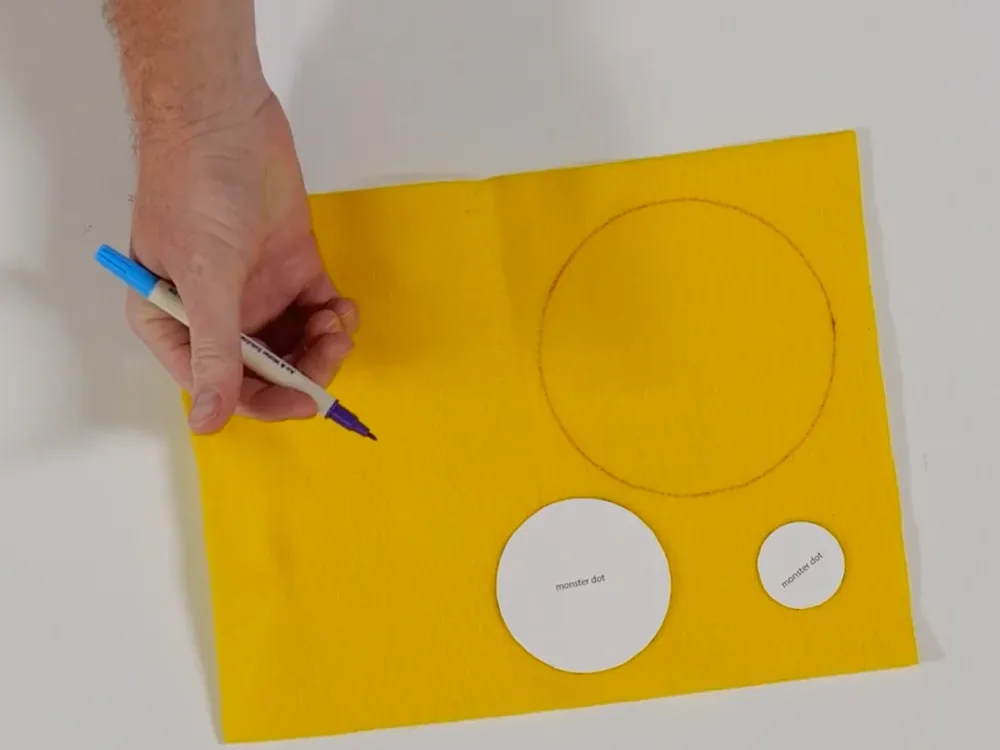
Print the provided "monster parts" templates on standard 8.5" x 11" paper. You should have one for the spots, the teeth, the dots for the eyes, and one for the horns. Cut out your paper pieces and organize them by which color felt you will use (the round black dots are for the eyes. no felt needed).
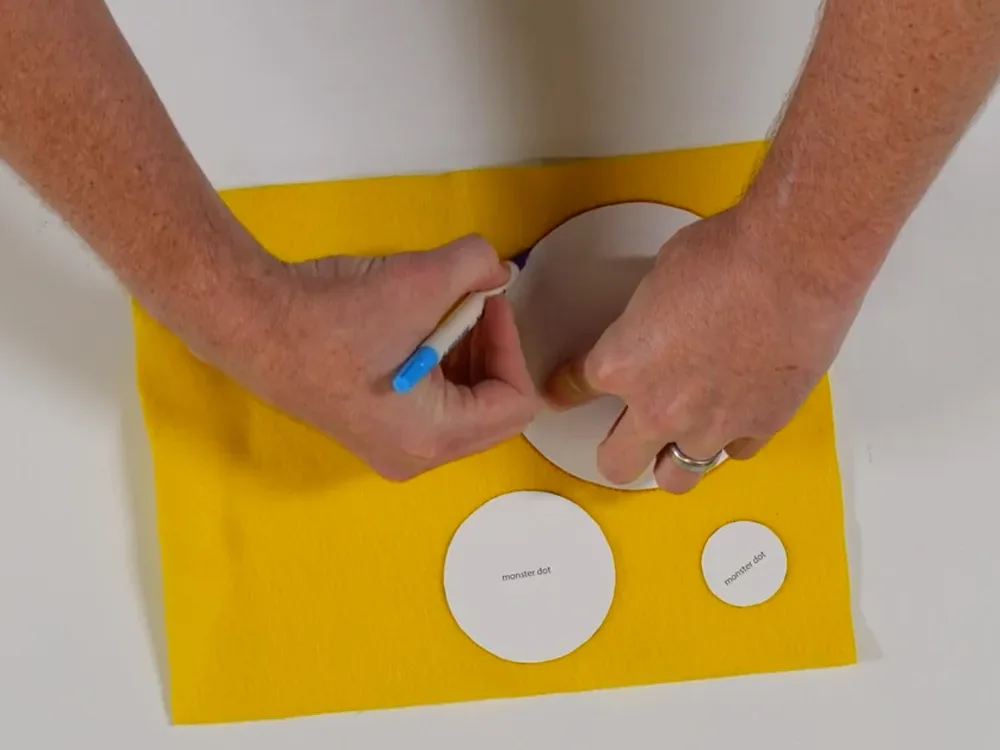
Trace some monster parts!
Trace each monster part/circle onto the felt with a fabric marker. Next, cut out your felt pieces. Be sure to cut inside the lines if you don't want your marker lines to be visible. Before you grab the glue gun, decide how you want to layout your monster parts. Choose your placement.
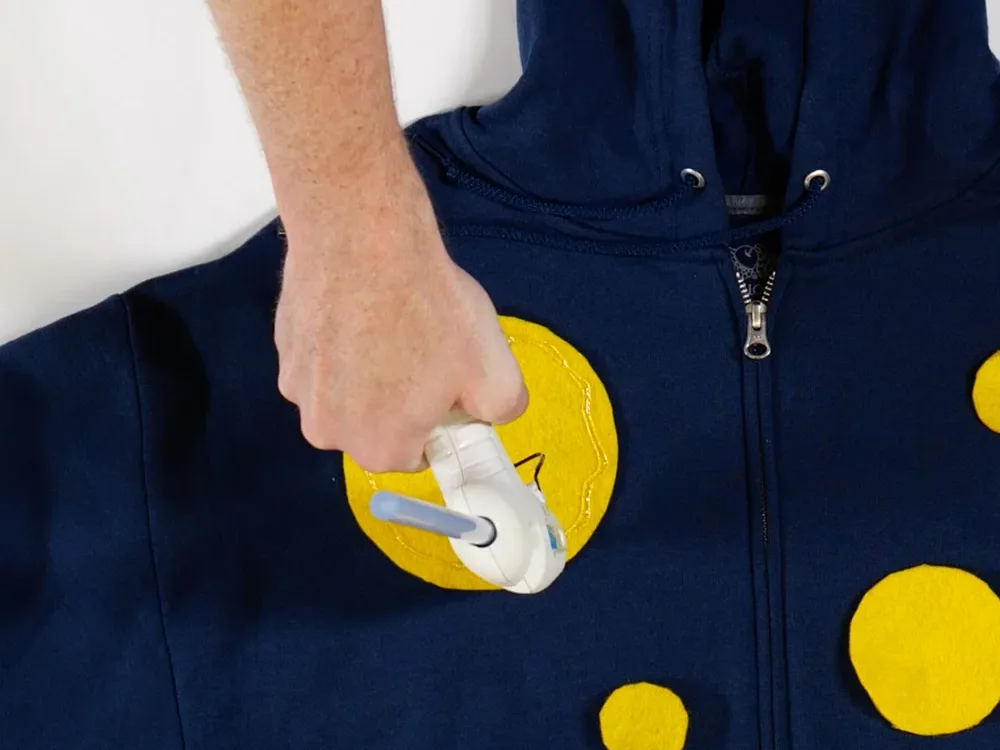
Let's start gluing!
Start with the "spots", and pick up one felt piece and glue around the outside edge. Carefully and gently apply the felt to the sweatshirt. Repeat this process until all circles have been applied to your sweatshirt. While you have your glue handy, you can go ahead and add your teeth. The straight edge of each tooth should be glued to the inside edge of the hood. This will make your teeth visible when your hood is up.
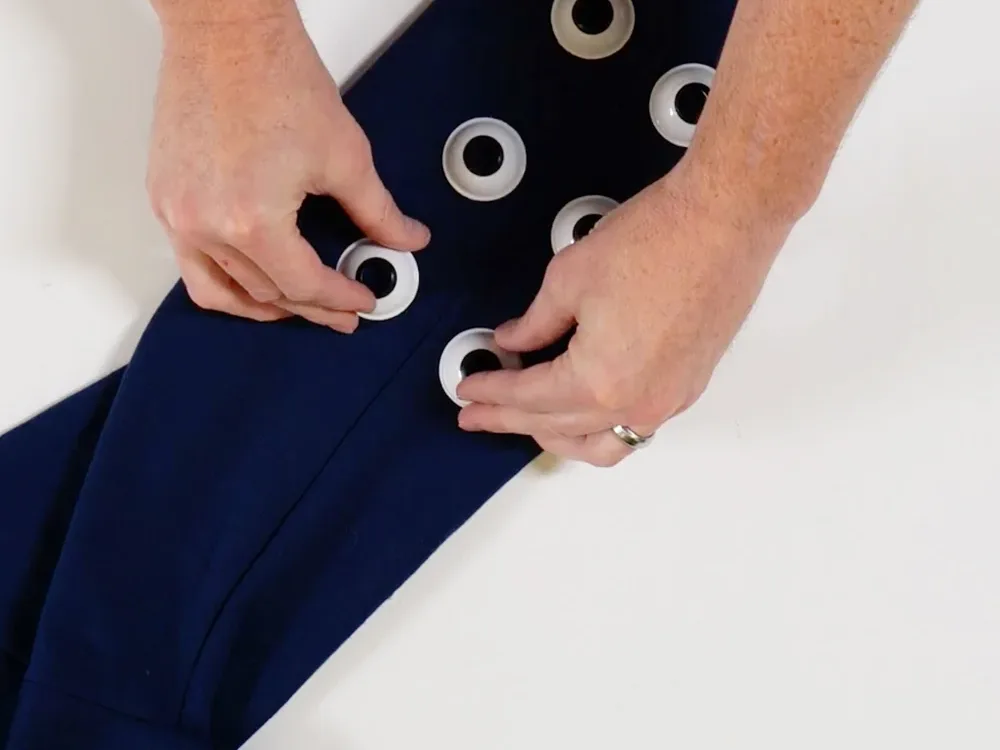
Add your tentacles!
For this step, first we are going to remove the lenses from those party glasses. We will only be using the lenses for this project. Layout the "tentacles" (lenses) on the sleeves, choosing your placement. For ours, we divided our tentacles evenly between our sleeves. Next, apply a small bead of glue around the outside edge and place each tentacle.
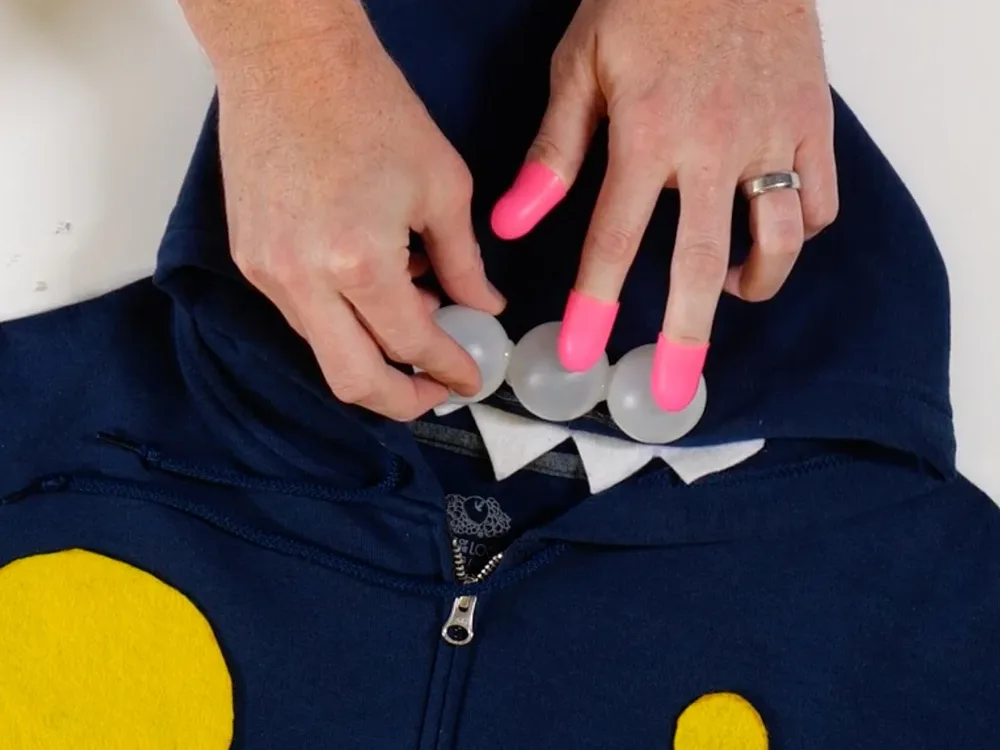
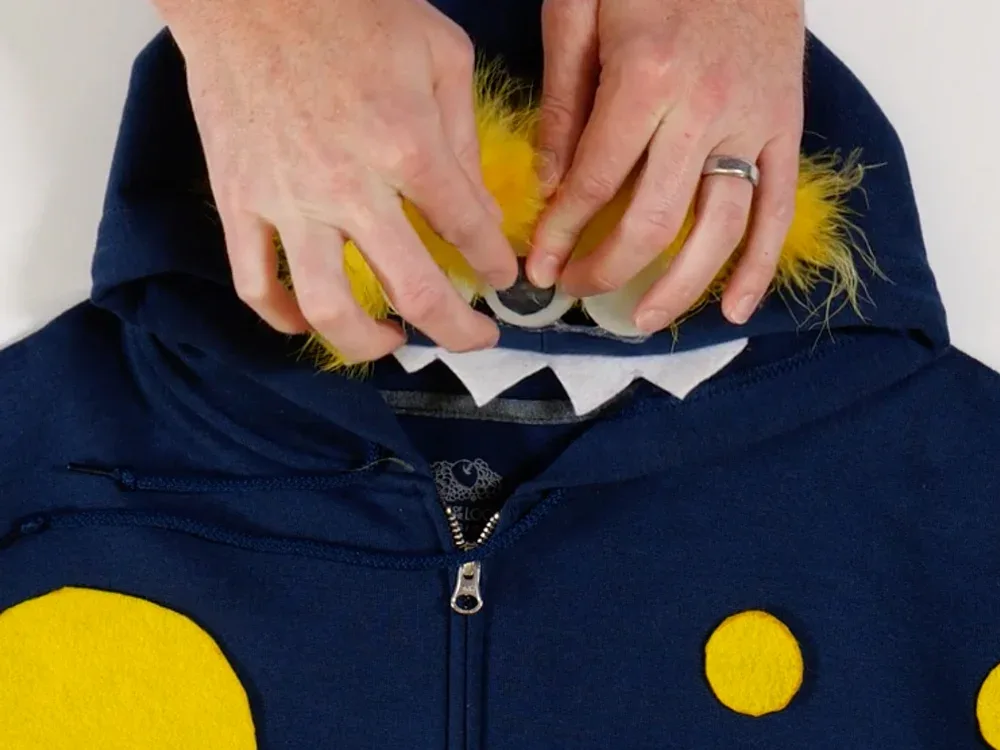
Add some eyes!
Three ping pong balls make up the eyes. At the front edge of the hood, locate the center seam and glue the first ball there. Glue an additional ball on either side. Now you have the base for the eyes!
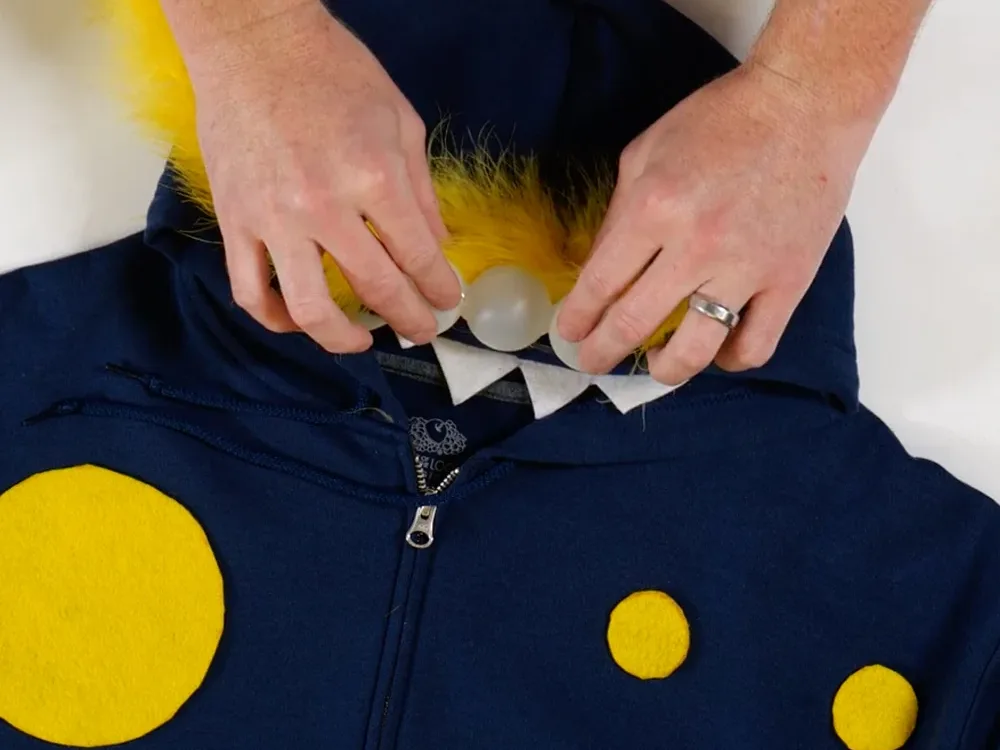
Add the eyebrows!
Let's add the eyebrows. For our eyebrows we used a feather boa, but you could use another fuzzy trim. Depending on the fullness of your boa or trim, you may want to add more than one piece to get very full eyebrows. This will be glued to the very top of the eyeballs.
Add the eyeballs!
Next, glue the black felt eyeball dots to the eyes.
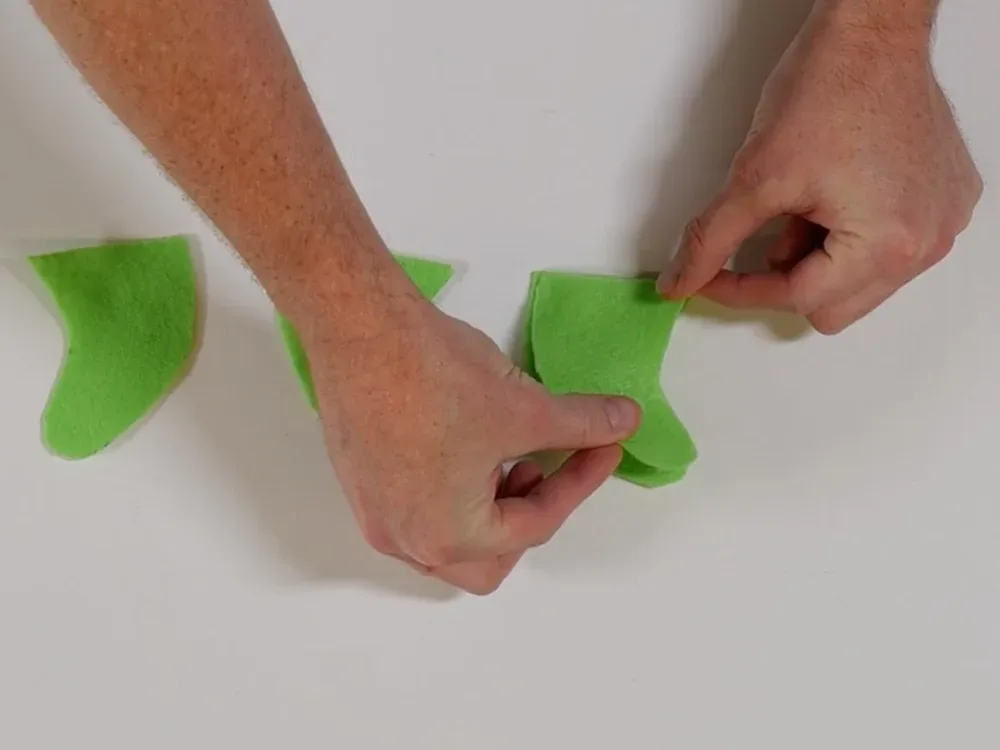
Add some horns!
It's the last step! You should have four "horn" pieces. Place two together and glue one on top of the other with the edges lined up. Repeat for other two pieces. You will let this dry for a few minutes and then turn them inside out. Now, stuff with fiber fill. Glue each horn closed. Decide on placement and glue to the top of the head.
Monster complete!
There you have it - your little monster is ready! Pair with matching sweatpants or leggings to complete the look.