DIY Spider Web Costume
(using Fruit of the Loom® sweatpant and crew sweatshirt)

DIY Spider Web Costume
You don't have to dust off the cobwebs of your sewing machine for this quick and simple no-sew spider web costume.
Estimated Cost: $30.00 or less
Use caution while crafting! Adult supervision recommended while using sharp or high-temp tools.
Costume garments:
Kids Fleece Full Zip Hoodie (charcoal)
Men's Cushioned Crew Socks (adult or child costume)
Costume supplies:
Fishing line
2 large googly eyes
Items you need but may already have:
Fiber fill (or pillow stuffing)
Hot glue gun
Glue sticks
Scissors
Optional:
Finger protection (for hot glue gun), fuzzy black fabric, Boys' Elastic Bottom Sweatpants (charcoal), [Adult Eversoft® Fleece Sweatpants](https://www.fruit.com/eversoft%C2%A0-fleece-elastic-bottom-sweatpants/A12000M.htm l)
Start with the spider web template!
Print the template on four 8.5" x 11" pages and trim on the dotted lines.
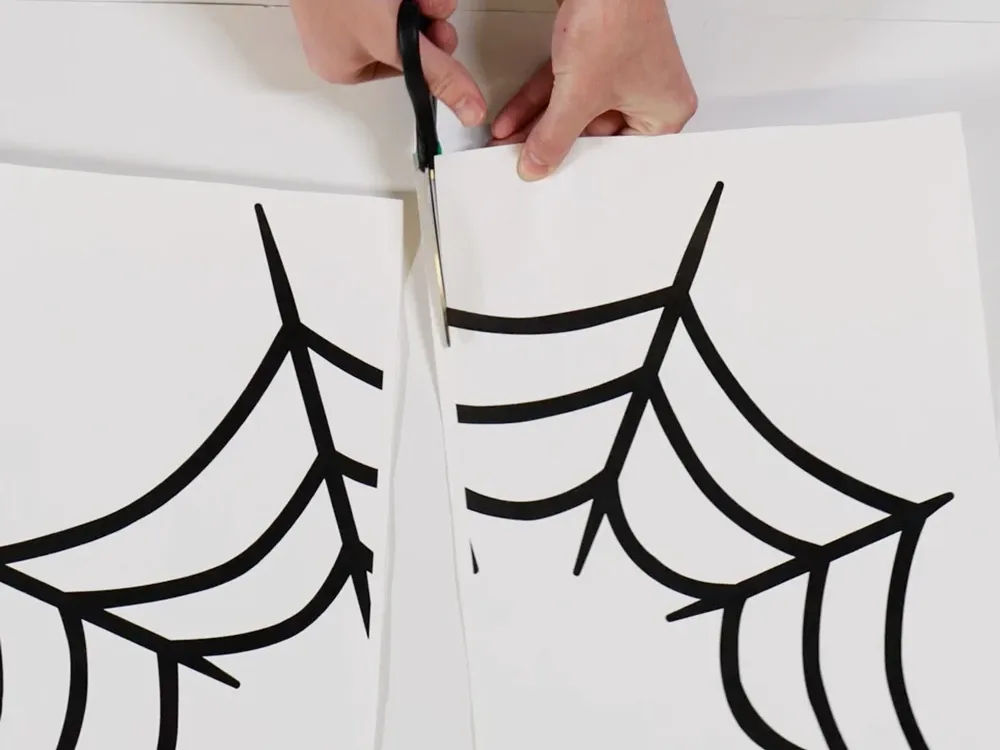
Line up and tape the template
Tape template at the seams so the design lines up.
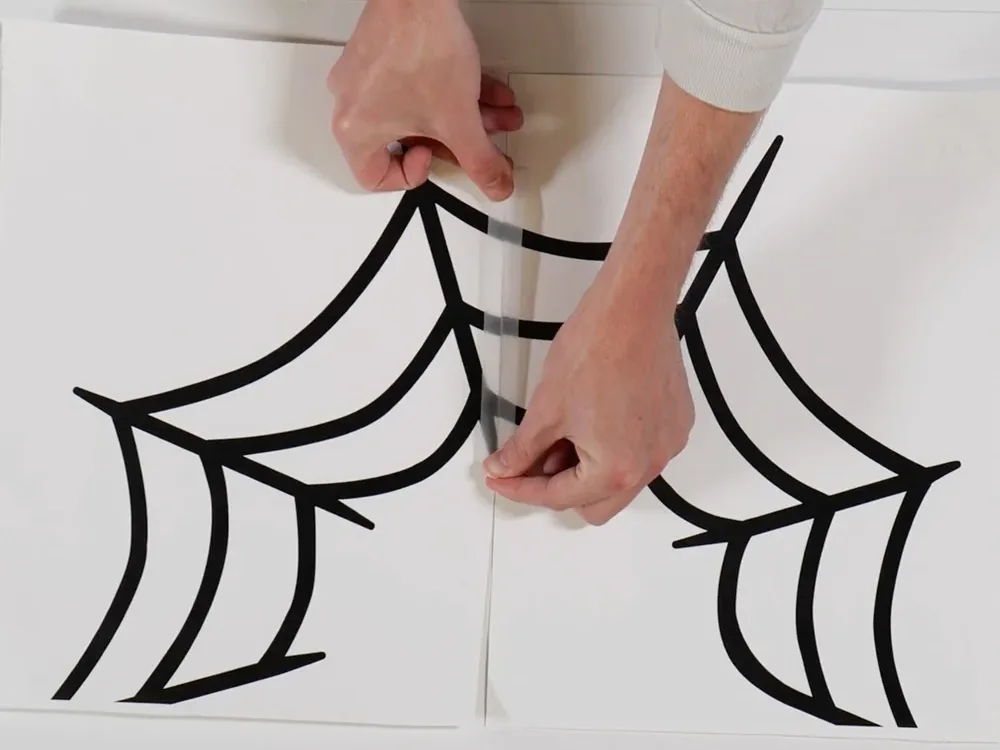
Make your template sturdier (optional)
For a sturdier template, we recommend gluing the template to poster board and cutting with a precision cutting tool prior to transferring to the sweatshirt.

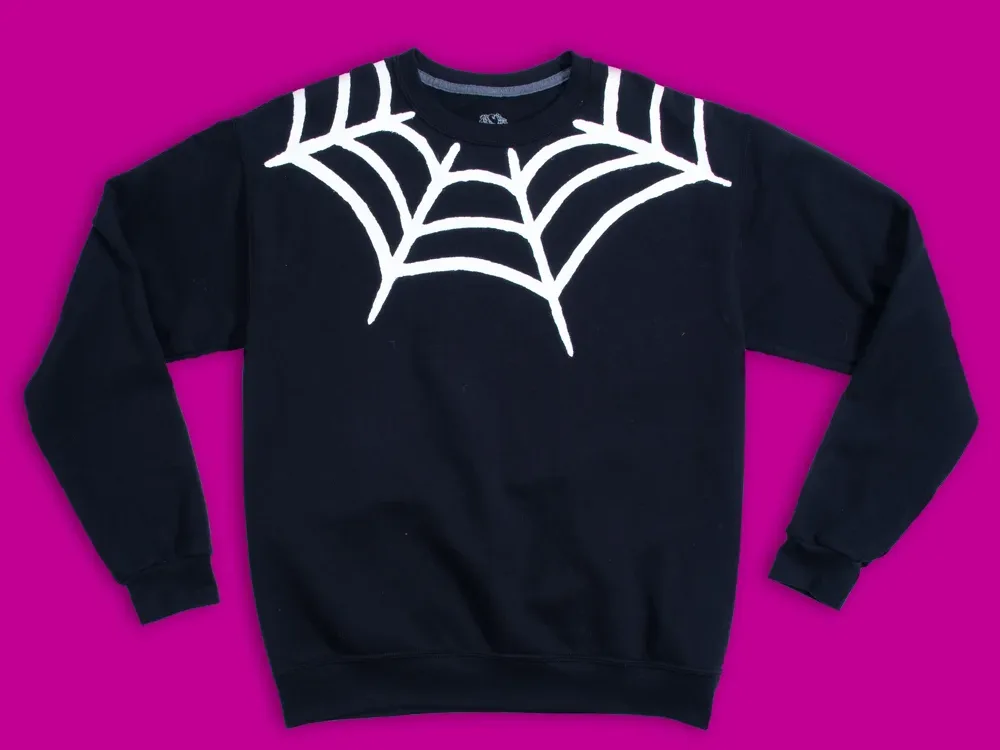
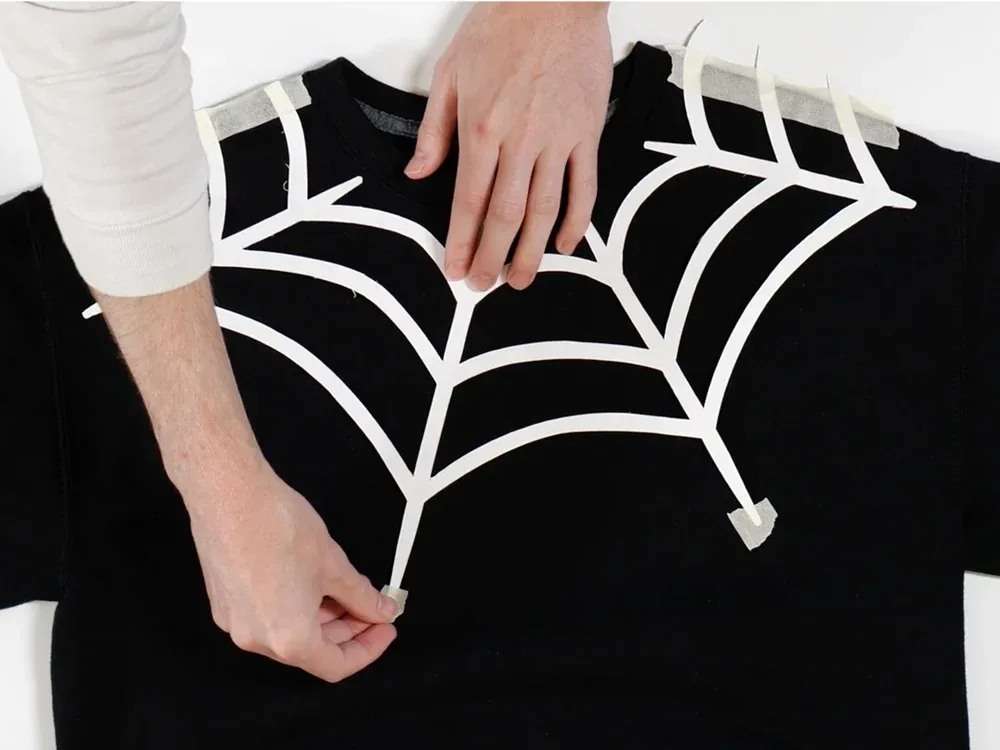
Position the web on the sweatshirt
Once cut out, place the template on the sweatshirt and align the web around the neck hole.
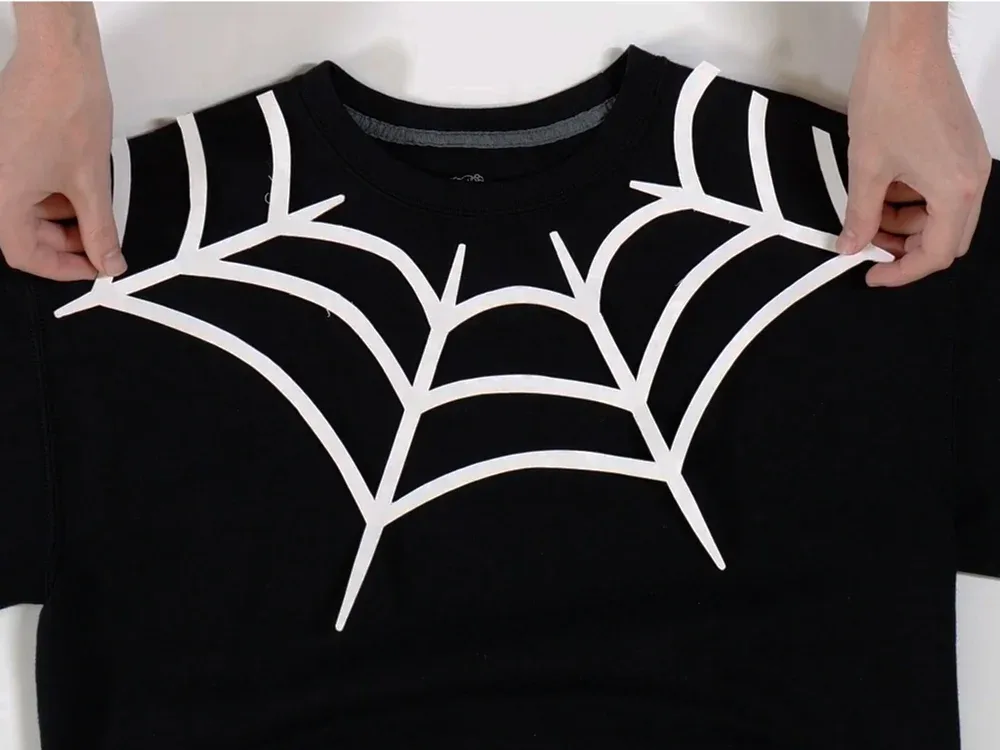
Secure the template in place
Tape the template to the sweatshirt once you have the best placement.
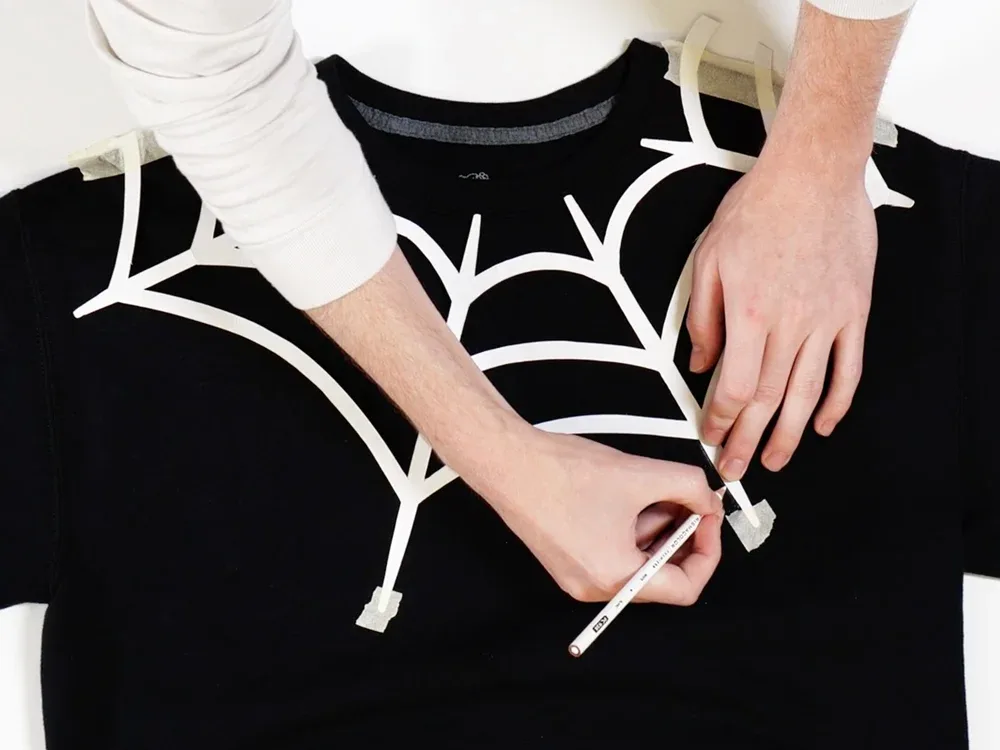
Trace the web design
Use a white color pencil to outline the web design. Once you can easily see the outline, remove the template and get ready to paint!
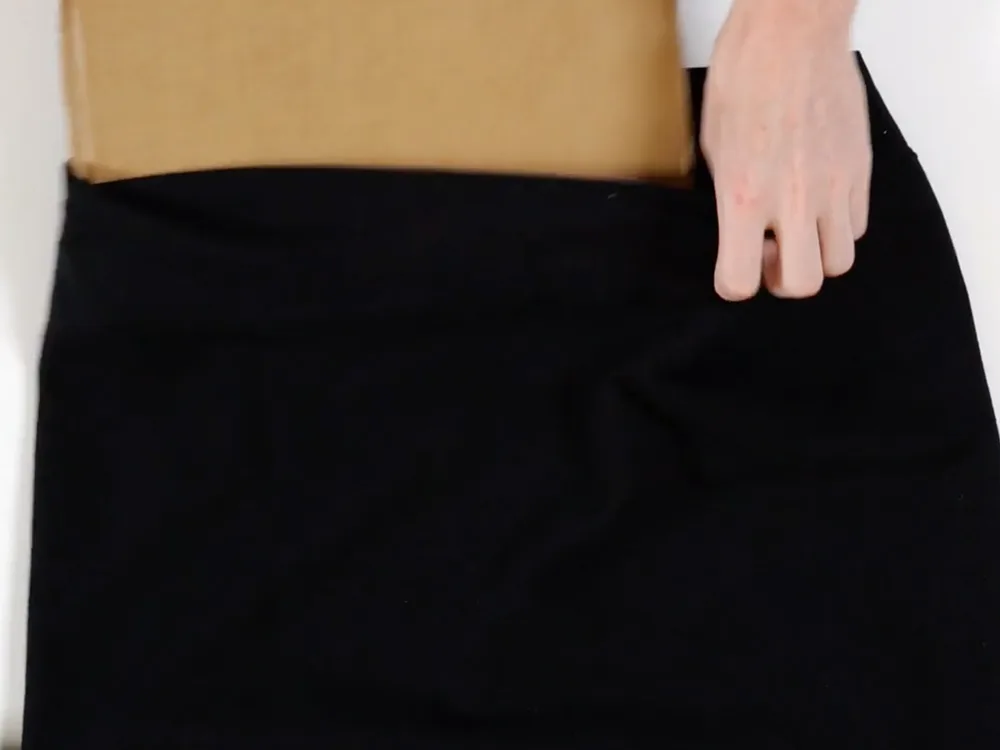
How to complete the painting of the web on the sweatshirt
Place a scrap piece of cardboard inside of the sweatshirt. It's best to place the sweatshirt in a position where the sleeves are horizontal to your body so you can work in a manner that will prevent paint smudging.
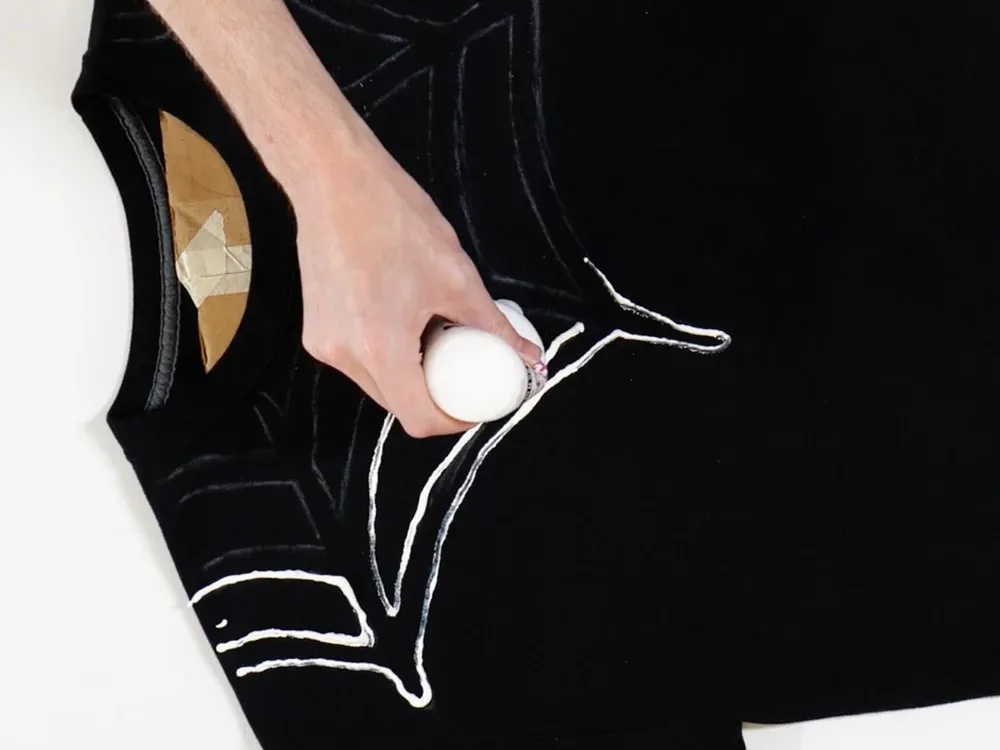
Begin painting the web
We recommend beginning at the farthest point from the body and beginning by outlining the design in paint and then filling in the space between those lines. Continue in this manner until you fill the entire design working from top to bottom. Let the design dry for 4 hours.
Add extra coats if needed
We applied 3 coats of paint for best results. If you'd like to apply another coat of paint, this is the time. If not, get ready to trick-or-treat!